-
How to Run a Virtualized SAPC using VMWare, for cs444
- This document derives from instructions
to run Xinu. Xinu is a small OS developed by
Dennis Comer at Perdue. We have used Xinu for grad OS
classes, running on SAPCs. Recently, the Perdue team has
gotten Xinu to run on VMWare, using a virtualized Linux host
called xinu-vserver, and a simple PC running Xinu, called
xinu-client.
- We'll use the same development host, xinu-vserver, from this setup, and substitute the Xinu-running PC (xinu-client) with an Tutor-running PC, i.e. a virtualized SAPC booting Tutor from its virtual floppy drive.
Please send
email to eoneil to correct this document or make it clearer.
- First, sign up for a VMWare download by sending email to eoneil if you didn't sign up on the sheet in class. You will get email giving you a login at a site from which you can download VMWare products.
- Get xinu-vm.tar.gz from ftp://ftp.cs.purdue.edu/pub/comer/private/Xinu, unpack it, and find file xinu-vserver.ovf in a subdirectory. Get vm_tutor.zip from our class web page, unpack it, and find file tutor.ovf. These files need to be available on your VMWare host machine, a 64-bit PC running Windows or Linux.
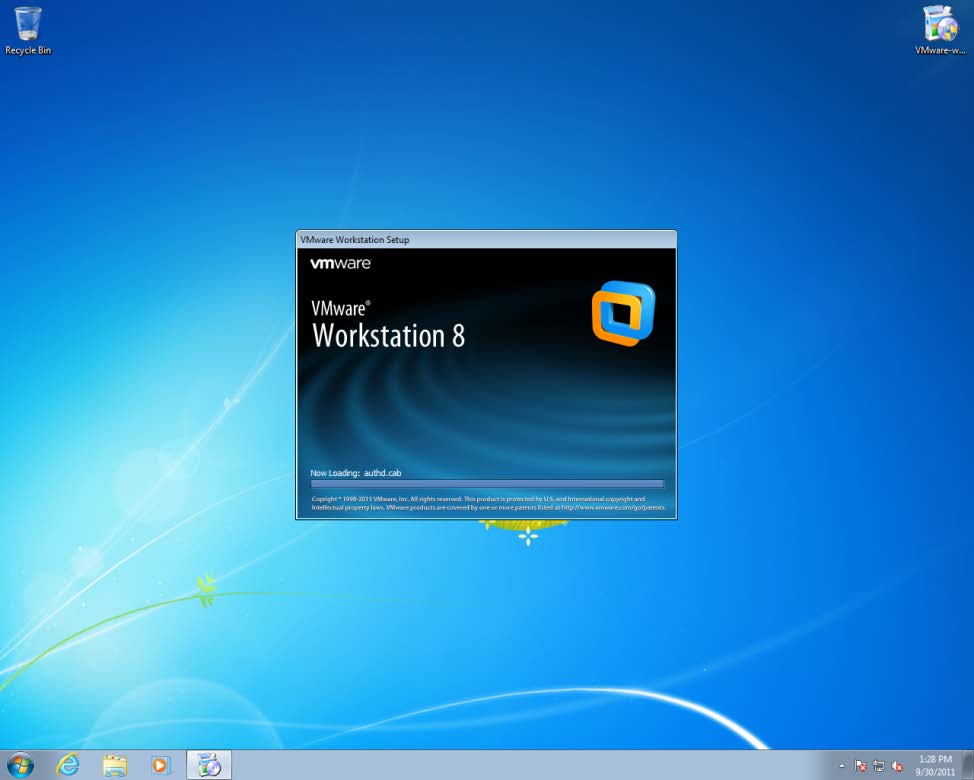
- 1. Install VMware Workstation 8 (probably Workstation 9 works as well, let me know) on your VMWare host machine.
- 2. Import "Open Virtualization Format" Virtual Machines.
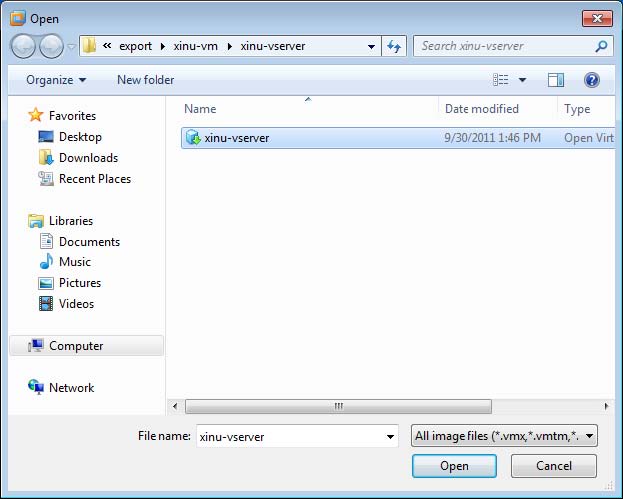
- 1) In Workstation, select File > Open.
- 2) In the drop-down to the right of the File Name: box, Choose to Open Virtual Machine Format Images (*.ovf, .ova), browse to xinu-vserver.ovf, and click Open.
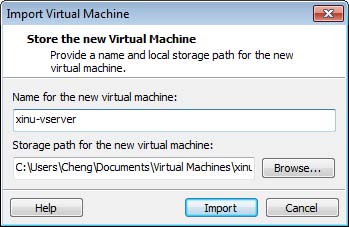
- 3) Browse to the directory for the virtual machine files, and click Import.
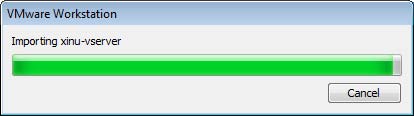
A status bar indicates the progress of the import process.
4) Use the same procedure to import tutor.ovf to a VM called tutor.
5. Connecting Two Virtual Machines with Serial Ports. As constructed from the .ovf file, the VMs have no serial ports, so we need to add them to the basic machines.
In xinu-vserver:
- 1) Select the virtual machine xinu-vserver and select VM > Settings.
- 2) On Hardware tab, click Add.
- 3) In the Add Hardware wizard, select Serial Port, click Next.
- 4) Select Output to named pipe, click Next.
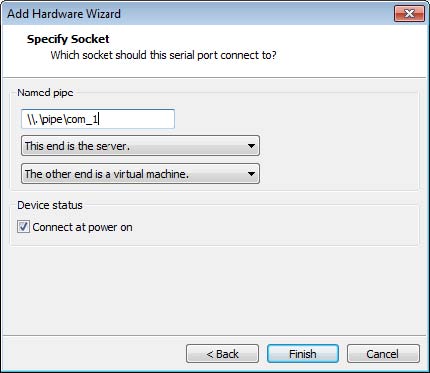
- 5) Configure the named pipe. The pipe name must begin with \\.\pipe\ and must be the same on both the server and the client. (e.g., \\.\pipe\com_1 ). Select This end is the server from the first drop-down menu and The other end is a virtual machine from the second drop-down menu. Select Connect at power on to connect the port to the virtual machine when the virtual machine powers on.
- 6) Click Finish to add the virtual serial port (COM1) to the virtual machine.
- Redo this procedure to create COM2, using \\.\pipe\com_2 as the named pipe
In tutor's VM:
- 1) Select the virtual machine xinu-vclient and select VM > Settings.
- 2) On Hardware tab, click Add.
- 3) In the Add Hardware wizard, select Serial Port, click Next.
- 4) Select Output to named pipe, click Next.
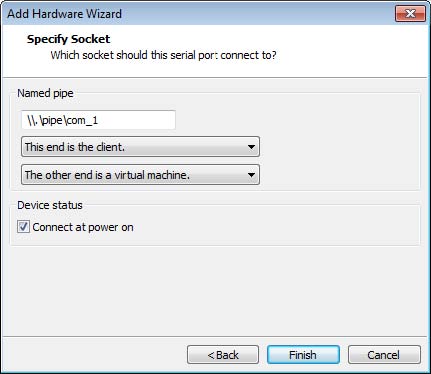
- 5) Configure the named pipe. The pipe name must begin with \\.\pipe\ and must be the same on both the server and the client. (e.g., \\.\pipe\com_1 ). Select This end is the client from the first drop-down menu and The other end is a virtual machine from the second drop-down menu. Select Connect at power on to connect the port to the virtual machine when the virtual machine powers on.
- 6) Click Finish to add the virtual serial port to the virtual machine.
Then redo
this procedure to add COM2, using \\.\pipe\com_2
as the named pipe. We will
use COM2 as the console line, to mimic our setup
on ulab.c
Now you have finished the configuration for virtual machines.
- 1. Turn on xinu-vserver and login to its Linux installation. The default user name is xinu and the default password is xinurocks. Under the home directory, there is a tarball called xinu-x86-vm.tar.gz, which includes a basic version of Xinu, but we don't need to use it.
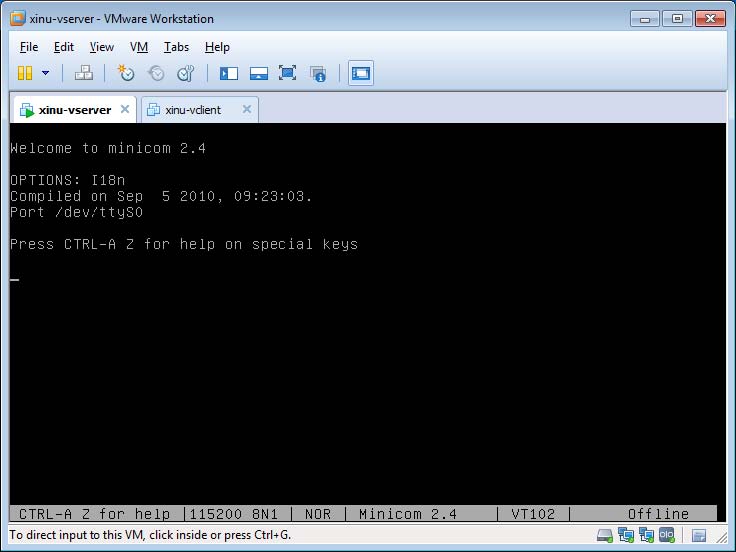
- 2. Open a minicom terminal by
typing sudo minicom.This is like
mtip without downloading ability.
Replace xinu-client with tutor in this picture, on the right tab.
- 3. Turn on tutor's VM
(leave the vserver-xinu VM by Cntl+Alt first).
Go back to the Linux VM and now you should be
able to talk to Tutor from the minicom
terminal you already are running
there.This connects using COM1 on the SAPC end,
/dev/ttyS0 on the linux end.
Replace Xinu output with Tutor output here, ending with Tutor>
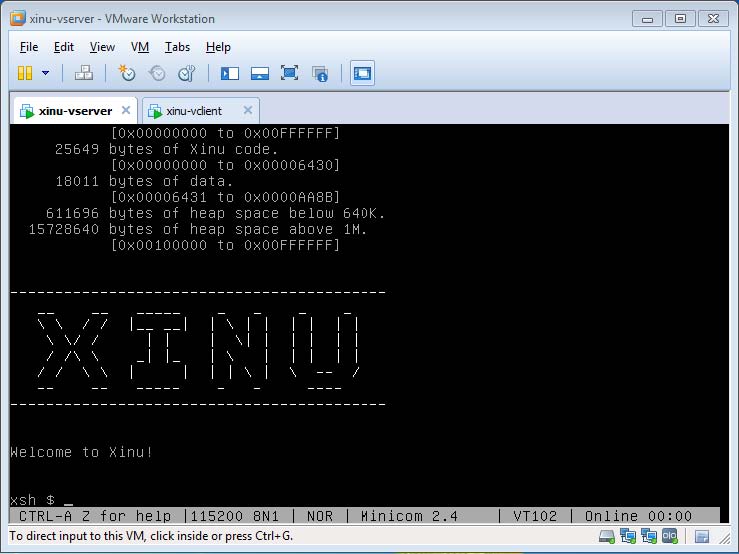
7. Run mtip (or sudo mtip if needed) to connect to the SAPC "tutor", talk to Tutor
- Exit from minicom by Cntl-A Q. Now you are back at the Linux shell prompt
- 4. To avoid having to use sudo with minicom and mtip, do "sudo chmod o+rw /dev/ttyS*" to make the Linux device nodes /dev/ttyS0 and /dev/ttyS1 publicly readable and writable.
5. Use "scp user@linux1.cs.umb.edu:/data/htdocs/cs444/mtip ." to transfer mtip to a local file, then copy it to /usr/bin with "sudo cp mtip /usr/bin", so that it is on your path.
6. Reboot the "tutor" VM by selecting its tab, right-clicking, and choosing "Send Cntl+Alt+Delete". We want to do this here to start using COM2 as the console connection with mtip. Later, use this instead of ~r.
8. Transfer your .lnx file built on ulab.cs.umb.edu by
scp user@linux2.cs.umb.edu:cs444/hw2/test.lnx .or whatever.
9. Use mtip to download and run your .lnx file just as if you were using ulab. No remote gdb available yet, however.